Comprehensive Guide to Setting Up a JS Project Using a Compressed File
This guide will walk you through the process of setting up a project using a compressed file. Please follow the steps below carefully.
Ensure that the package.json file is present in your project.
Compressing the Project
To compress a file on Linux-based operating systems, you can use the following command:
zip -r project.zip project_folder
Please note that the compressed file format must be zip, and avoid using any other compression formats (such as rar, gz, 7z) when uploading to Kubar.
1. Initial Setup
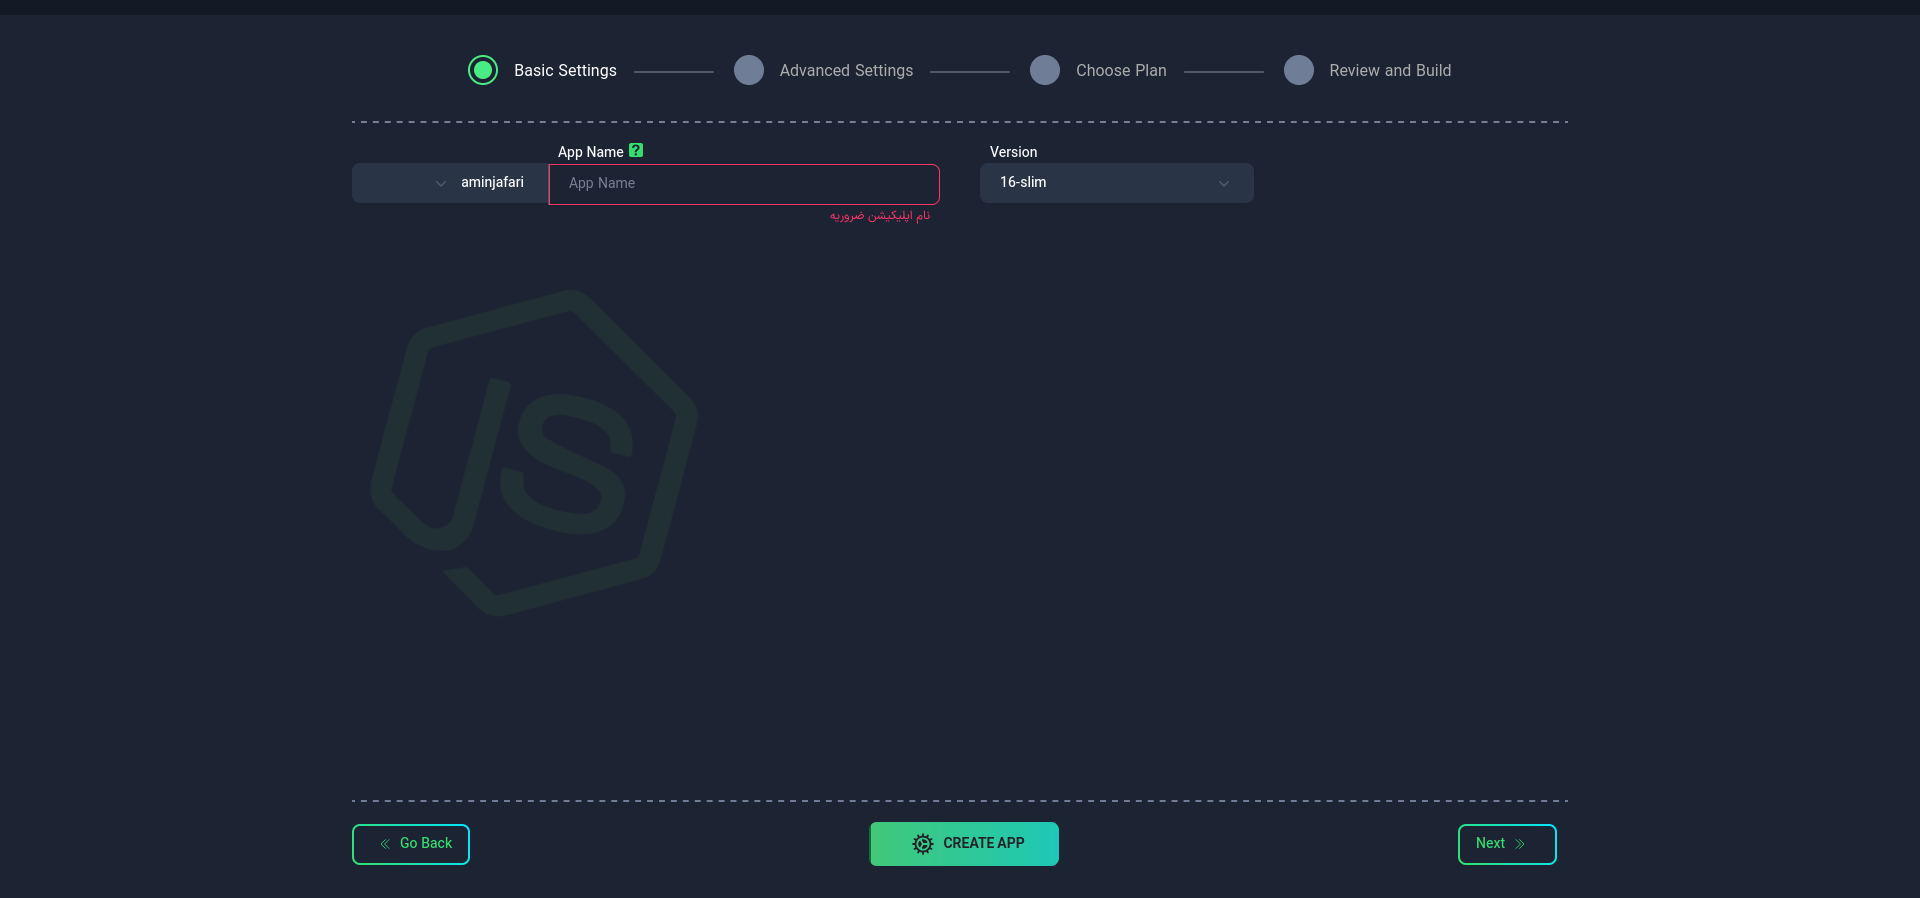
Application Name
First, choose a suitable name for your application. This name will be used as the identifier in your project's domain.
- Use lowercase letters and only - as a separator between words.
- You cannot change the application name after creating the app.
Node Version
Select the Node version used in your project. You can choose from the available list or manually enter the version. Please ensure that the Node version you use is available in the Docker Hub or other related Docker repositories.
After completing this step, select the "Next" option.
2. Advanced Settings (Optional)
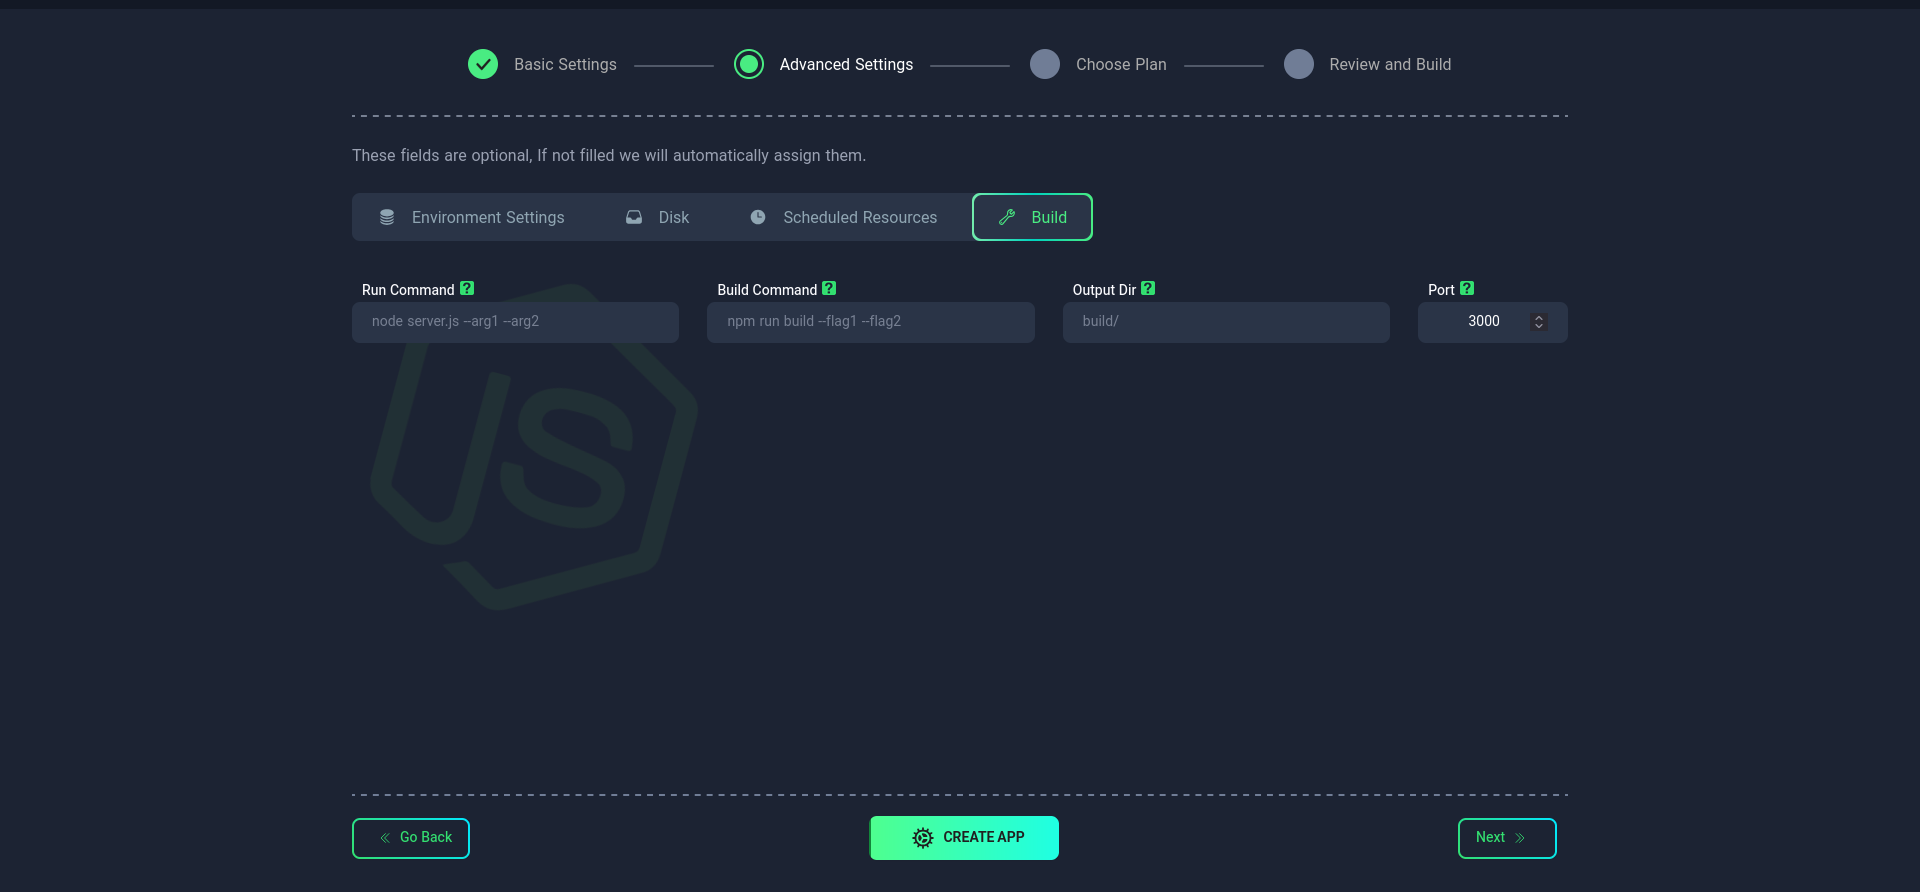
In this section, you can apply more precise settings for your project:
Build
Sample package.json file:
{
  "name": "your-project-name",
  "version": "1.0.0",
  "description": "Your project description",
  "main": "index.js",
  "type": "commonjs",
  "private": true,

  "scripts": {
    "start": "node index.js",
    "dev": "nodemon index.js",
    "test": "jest",
    "lint": "eslint .",
    "build": "tsc",
    "clean": "rm -rf dist"
  },

  "keywords": [
    "nodejs",
    "express",
    "api"
  ],

  "author": "Your Name <your.email@example.com>",
  "license": "MIT",

  "dependencies": {
    "express": "^4.18.2",
    "dotenv": "^16.3.1",
    "mongoose": "^7.6.3",
    "cors": "^2.8.5",
    "helmet": "^7.0.0",
    "jsonwebtoken": "^9.0.2",
    "bcryptjs": "^2.4.3"
  },

  "devDependencies": {
    "nodemon": "^3.0.1",
    "jest": "^29.7.0",
    "eslint": "^8.51.0",
    "typescript": "^5.2.2",
    "@types/node": "^20.8.6",
    "@types/express": "^4.17.18"
  },

  "engines": {
    "node": ">=16.0.0",
    "npm": ">=8.0.0"
  },

  "repository": {
    "type": "git",
    "url": "git+https://github.com/yourusername/your-repo.git"
  },

  "bugs": {
    "url": "https://github.com/yourusername/your-repo/issues"
  },

  "homepage": "https://github.com/yourusername/your-repo#readme"
}
Build Command
- Specific command(s) for building the project
- Default:
npm run build - To use multiple commands, use ; as a separator (e.g.,
npm run build;npm run start)
Run Command
- Command to run the project
- For JS.js, it is better not to enter any command
Output Folder
- Location of the built files
- Default:
dist/
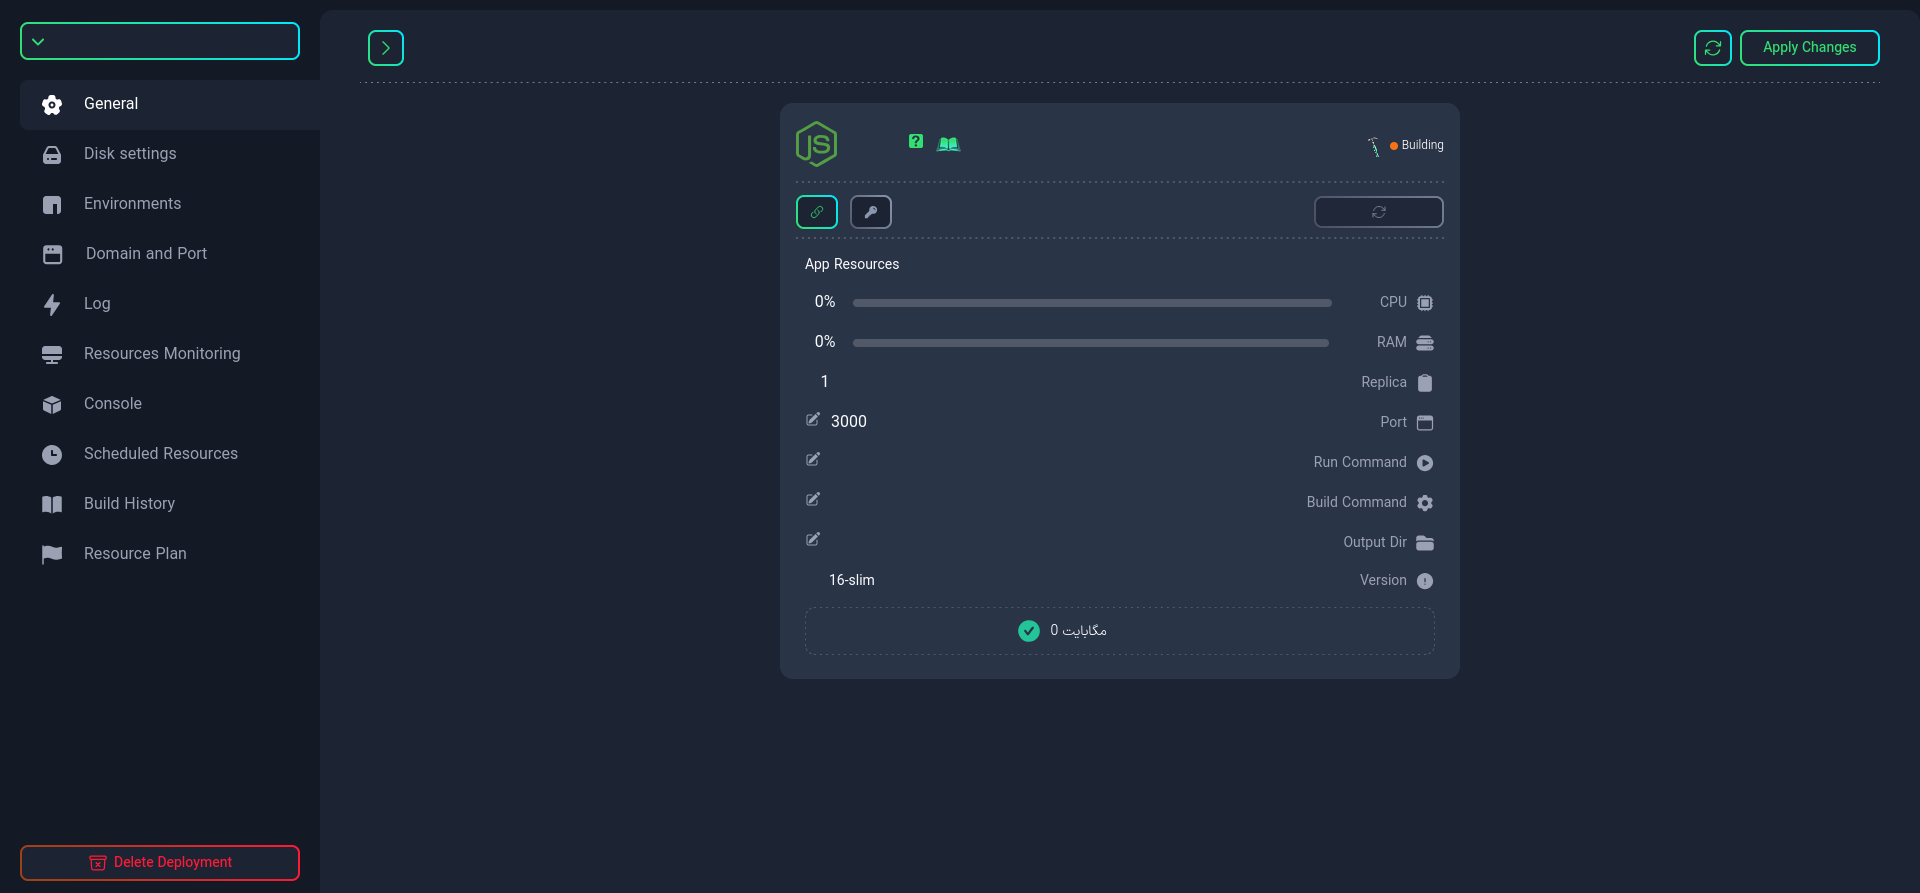
Port
Specify the port number on which your application will run. The default port is 3000, but you can change it.
- After the initial setup, you can change the port
- When specifying the port, always use the address
0.0.0.0.
Resource Scheduling
Disk
Environment Variables
3. Plan Selection
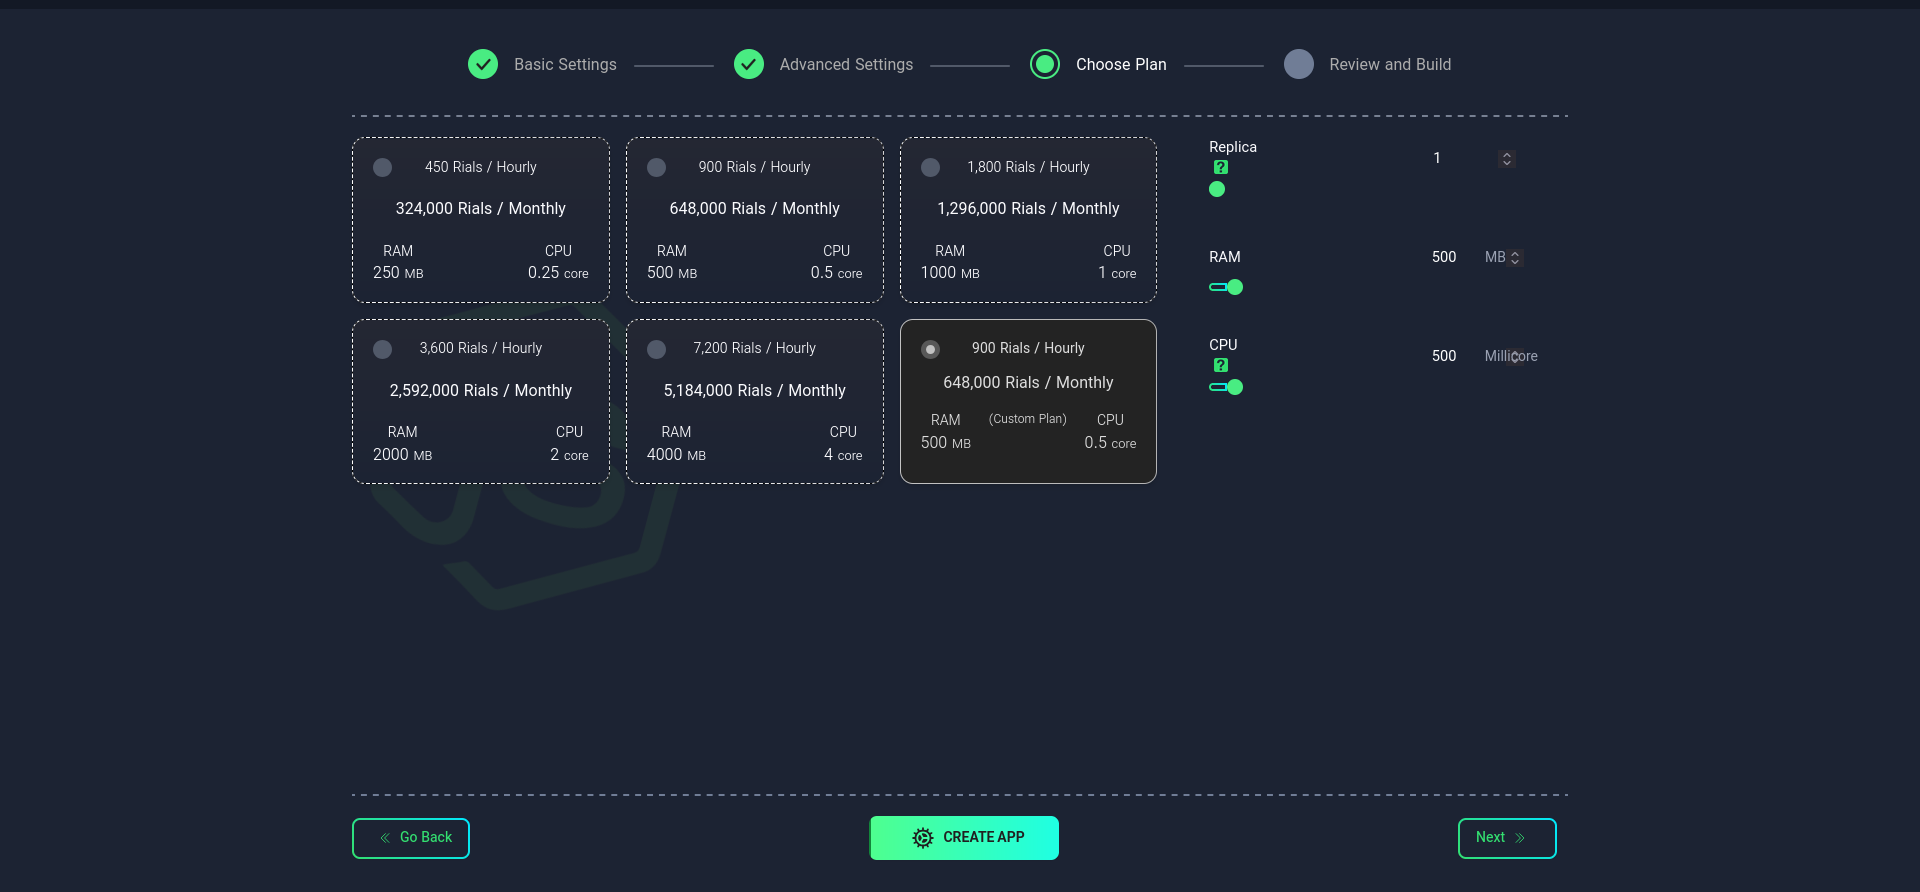
In this step, select your desired plan. You can choose from the available list or configure it manually.
Replica
Specify the number of replicas (executable instances) for your application. This number affects the performance and availability of your application.
Importance of Replica Count
- Scalability: Increase processing power by increasing the number of replicas
- High Availability: Maintain performance if one instance fails
- Load Distribution: Distribute the load across multiple instances
After selecting the desired plan, choose the Create App option.
4. File Upload
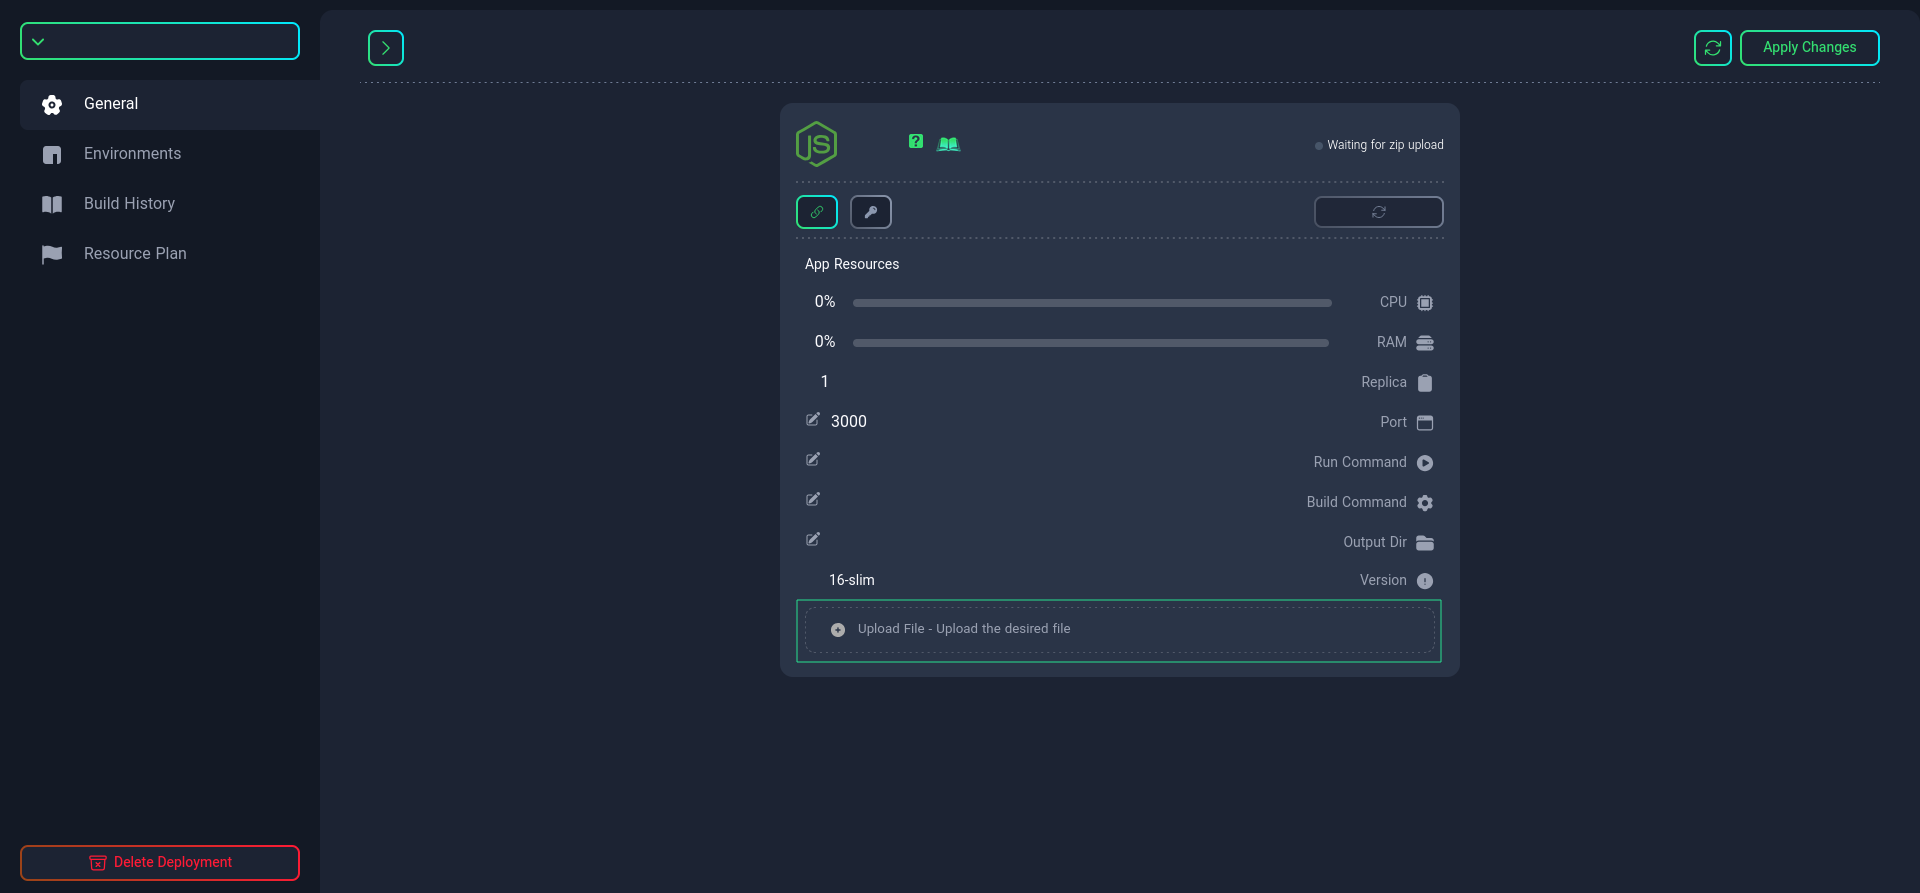
After creating your JS app, upload the compressed project file by clicking the "Upload File" button. Wait for the project to build.
5. Project Management
After the project is built, you can manage your project from the "Project Management" section. In this section, you will have access to project management features:
-
Check project status
-
Manage connections and resources
-
Manage ports
infoThe port you defined in your project must also be defined in this section.
-
Change the Dockerfile name (if needed)
tipIf your project requires very specific settings, you can create your own custom Dockerfile. For more information, refer to this link.
-
Change the build command

-
Change the run command

-
Specify the output folder location

If you want to use multiple commands for building the project, use ; as a separator (e.g., npm run build;npm run start).
Using these features, you can effectively manage and maintain your project.